
FreeStyle Lite Blood Glucose Monitoring System Manual: A Comprehensive Guide
This manual provides comprehensive instructions for the FreeStyle Lite blood glucose monitoring system. It covers setup, testing, data management, care, and troubleshooting. Follow these guidelines for accurate results and effective diabetes management.
The FreeStyle Lite blood glucose monitoring system offers a simple and convenient way to manage your diabetes. Designed for ease of use, it provides accurate results from a small blood sample, allowing you to monitor your glucose levels effectively. This system is compatible with FreeStyle Lite test strips, ensuring reliable performance.
This user manual will guide you through every step, from initial setup to understanding your test results. Whether you’re newly diagnosed or have been managing diabetes for years, the FreeStyle Lite system can help you stay informed and in control. With its compact design, it’s easy to carry with you, enabling on-the-go testing whenever needed.
The system requires only a tiny 0.3 microliter blood sample, minimizing discomfort during testing. It is crucial to read all the instructions carefully before using the FreeStyle Lite system. Proper use ensures accurate readings and helps you make informed decisions about your health. By familiarizing yourself with the system’s features and procedures, you can confidently manage your blood glucose levels.
Key Features of the FreeStyle Lite Meter
The FreeStyle Lite meter boasts several key features designed for ease of use and accurate blood glucose monitoring. Its small sample size requirement of just 0.3 microliters minimizes discomfort during testing, making it a more pleasant experience. The meter is also known for its fast testing time, providing results quickly so you can make informed decisions promptly.
Another notable feature is its compatibility with FreeStyle Lite test strips, which incorporate ZipWik tabs for easy blood application. The meter’s compact and discreet design allows for convenient portability, fitting easily into a purse or pocket. This makes it ideal for on-the-go monitoring, ensuring you can manage your diabetes wherever you are.
The FreeStyle Lite meter also offers a clear and easy-to-read display, enhancing usability for individuals of all ages. Its user-friendly interface simplifies the testing process, reducing the learning curve. With its combination of accuracy, speed, and convenience, the FreeStyle Lite meter is a valuable tool for effective diabetes management.
Getting Started with Your FreeStyle Lite Meter
This section guides you through the initial setup of your FreeStyle Lite meter. Learn how to properly insert test strips and perform your first blood glucose test.
Initial Setup and Device Overview
Before using your FreeStyle Lite meter, familiarize yourself with its components. The kit includes the meter itself, a user manual, and usually a case for storage. Examine the meter to identify the display screen, test strip port, and buttons.
The display screen shows your blood glucose readings, date, time, and any error messages. The test strip port is where you insert the FreeStyle Lite test strips. The buttons are used to navigate the meter’s menu and settings.
To begin, ensure the meter has batteries installed. If not, refer to the manual for instructions on battery installation. Once powered on, set the date and time accurately. This is crucial for tracking your blood glucose levels over time. The FreeStyle Lite meter is designed for use with FreeStyle Lite test strips exclusively.
Using other test strips may result in inaccurate readings. Please read the entire manual before you start.
Inserting and Removing Test Strips
Proper insertion and removal of test strips are crucial for accurate blood glucose readings with your FreeStyle Lite meter. Always use FreeStyle Lite test strips, as other brands may not be compatible and can lead to inaccurate results.
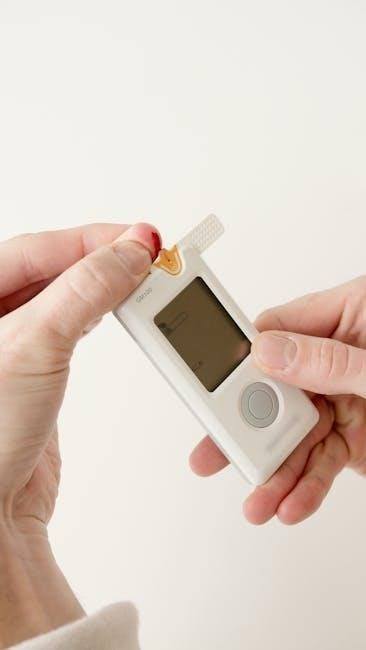
To insert a test strip, hold it with the ZipWik tab facing upwards. Gently slide the test strip into the test strip port of the meter. Ensure it is fully inserted until it stops. The meter will automatically turn on and display a blood drop symbol, indicating it is ready for a blood sample.
Avoid bending or damaging the test strip during insertion. Once the test is complete, to remove the used test strip, simply pull it straight out of the test strip port. Dispose of the used test strip properly, following your local guidelines for biohazardous waste. Never reuse a test strip. Make sure to read the manual carefully.
Performing a Blood Glucose Test
To accurately monitor your blood glucose levels using the FreeStyle Lite meter, follow these detailed steps. First, ensure you have properly inserted a FreeStyle Lite test strip into the meter. The meter should power on automatically and display a flashing blood drop symbol, indicating it’s ready.
Next, obtain a small blood sample using your lancing device. Apply the blood drop to the designated area on the test strip, usually the edge with the ZipWik tab. The meter will beep, indicating that enough blood has been applied. Avoid smearing or pushing the blood onto the strip.
Wait for the meter to count down. The countdown duration is short, typically just a few seconds. Once the countdown is complete, your blood glucose reading will be displayed on the screen. Record your result for tracking and management purposes.
Understanding Your Test Results
Interpreting your FreeStyle Lite blood glucose readings is crucial for effective diabetes management. This section provides guidance on normal ranges and troubleshooting tips to ensure accurate understanding and appropriate action.
Normal Blood Glucose Ranges
Understanding normal blood glucose ranges is essential for managing diabetes effectively with the FreeStyle Lite system. Generally, target ranges vary depending on individual factors and should be determined in consultation with your healthcare provider. However, some general guidelines can be followed.
For most non-pregnant adults with diabetes, the American Diabetes Association recommends a pre-meal (fasting) blood glucose level of 80-130 mg/dL. Post-meal (1-2 hours after starting a meal) blood glucose should be less than 180 mg/dL.
These ranges are guidelines and may not be appropriate for everyone. Factors such as age, other health conditions, and medications can influence target ranges. Children, pregnant women, and individuals with a history of hypoglycemia may have different target ranges.
Regularly monitoring your blood glucose levels with the FreeStyle Lite meter and comparing them to your target ranges will help you and your healthcare provider make informed decisions about your diabetes management plan. Always consult your doctor for personalized advice and to establish your ideal blood glucose ranges.
Troubleshooting Common Issues
The FreeStyle Lite system is designed for ease of use, but occasionally, you might encounter issues. This section addresses common problems and their solutions. If you experience persistent problems, consult your healthcare provider.
Problem: Error messages appear on the meter.
Solution: Refer to the user manual for specific error codes and corresponding actions. Ensure test strips are not expired and are properly inserted. Replace the battery if it’s low.
Problem: Inaccurate readings.
Solution: Verify the control solution results are within the acceptable range. Ensure the test strip is not damaged or expired. Clean the meter and your hands before testing. Avoid squeezing the finger excessively when obtaining a blood sample.
Problem: Meter won’t turn on.
Solution: Replace the battery. Ensure the battery is correctly installed. If the issue persists, contact customer support.
Problem: Insufficient blood sample.
Solution: Adjust the lancing device depth. Warm your hands to improve circulation. Gently massage the finger before lancing.
Always refer to the complete user manual for detailed troubleshooting steps and safety information. If problems persist, seek professional assistance.
Using the Lancing Device
Proper use of the lancing device is crucial for obtaining an adequate blood sample. This section covers preparing the device and safely obtaining a blood drop for accurate glucose testing.
Preparing the Lancing Device
Before obtaining a blood sample, preparing the lancing device is crucial; First, ensure you have a compatible lancing device, preferably a FreeStyle lancing device. Refer to the lancing device insert included with your FreeStyle Lite system for detailed instructions and safety information.
Begin by washing your hands thoroughly with soap and warm water. Dry them completely before handling the lancing device or lancets. Next, remove the lancing device cap by twisting or pulling it off, depending on the model.
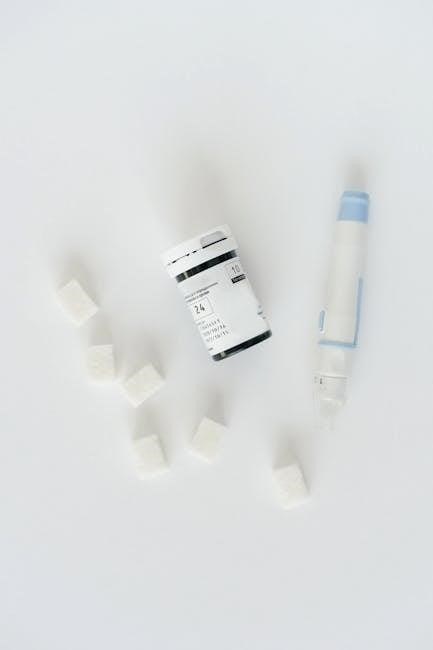
Insert a fresh, sterile lancet into the designated slot of the lancing device. Ensure the lancet is fully seated and locked in place according to the manufacturer’s instructions. Twist off the protective cover from the lancet, being careful not to touch the exposed needle.
Replace the lancing device cap securely. Adjust the depth setting on the lancing device to suit your skin type and preference. Start with a shallow setting and increase it gradually if needed to obtain a sufficient blood sample. The goal is to use the shallowest setting that consistently provides an adequate blood drop for testing with your FreeStyle Lite meter.
Obtaining a Blood Sample
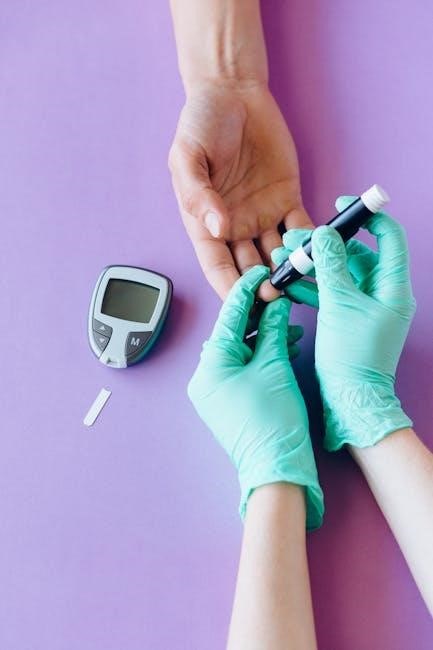
After preparing the lancing device, obtaining an adequate blood sample is the next essential step. Choose a suitable testing site on your finger, preferably on the side of the fingertip, as this area tends to be less sensitive. Alternatively, you can use your palm or forearm after consulting with your healthcare provider.
Clean the chosen site with an alcohol swab and allow it to air dry completely. This helps to prevent infection and ensures accurate blood glucose readings. Once the area is dry, hold the lancing device firmly against the selected site.
Press the release button on the lancing device to prick your skin. Immediately lift the device away from your finger. Gently massage or apply slight pressure around the puncture site to encourage a blood drop to form. Avoid squeezing too hard, as this can dilute the blood sample with tissue fluid and affect the accuracy of the results.
Ensure the blood drop is large enough to cover the sample area on the FreeStyle Lite test strip. A small drop of 0.3 microliters is typically sufficient. If the blood drop is too small, gently massage the area again or consider using a slightly deeper lancing depth for subsequent tests.
Data Management and Connectivity
Effectively managing your blood glucose data is crucial. The FreeStyle Lite allows data downloading, enabling you to track trends using LibreView. This promotes better diabetes management and informed discussions with your healthcare provider.
Downloading Data to LibreView
To effectively manage your blood glucose readings recorded by your FreeStyle Lite meter, you can upload the data to LibreView, a secure, web-based diabetes management system. This process requires a compatible computer and a USB cable (included with the FreeStyle Libre scanner).
First, ensure you have a LibreView account. If not, register on the LibreView website. Next, connect your FreeStyle Lite meter to your computer using the USB cable. Once connected, log in to your LibreView account.
LibreView will guide you through the process of uploading data from your meter. Follow the on-screen prompts to seamlessly transfer your glucose readings. This uploaded information allows you to generate insightful reports, track trends, and share data with your healthcare professional. Regular data uploads to LibreView are essential for proactive diabetes management and informed decision-making.
Remember to consult the LibreView website for detailed instructions and troubleshooting tips.

Care and Maintenance
Proper care ensures accurate readings and prolongs your FreeStyle Lite meter’s life. This includes regular cleaning, correct storage, and handling test strips appropriately. Refer to the following sections for detailed instructions.
Cleaning and Storing Your Meter
Maintaining your FreeStyle Lite meter properly ensures its accuracy and longevity. Regular cleaning is essential to remove dust, blood, or other contaminants that could affect performance. Use a soft, damp cloth to gently wipe the meter’s exterior. Avoid using harsh chemicals, solvents, or immersing the meter in water, as this can damage the electronic components. Ensure the meter is completely dry before storing it.
Proper storage is equally important. Keep the meter in its protective case when not in use to prevent physical damage. Store the meter and test strips in a cool, dry place, away from direct sunlight and extreme temperatures. Avoid storing them in humid environments, such as bathrooms, as moisture can compromise the test strips’ integrity. Always keep the test strip vial tightly closed to protect them from humidity. Check the expiration date on the test strip vial and discard any expired strips. Batteries should be removed if the meter is not in use for an extended period, to prevent leakage and corrosion.